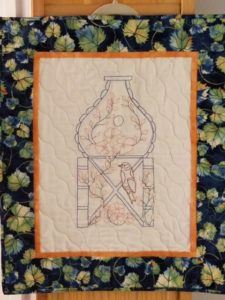
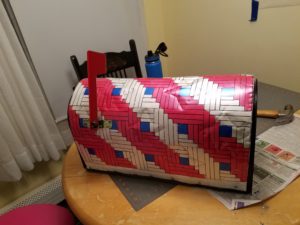
Who’s ready for Spring? Not this raining stuff but green in the trees, the pretty flowers, the American Goldfinches back to their yellow feathers. I am and here’s my latest project :The Finch House”. Oh, please Sister Sun, come out!
A Quilted Mailbox??
Late this past January, I read a small blurb in The Advertiser (our local small communities newspaper) about the Sand Lake Historical Society calling for artists to decorate mailboxes for an upcoming fundraiser. This sounded intriguing. I called the phone number the very next morning and spoke to a lovely woman named Barbara. She explained that the response to her article had been very positive and she thought she was all set. She asked what I had in mind. When I said a quilted one, well, let’s just say that suddenly there was an opening! She would provide the mailbox in couple of weeks, I’d have a couple of weeks to create and deliver the box back to her.
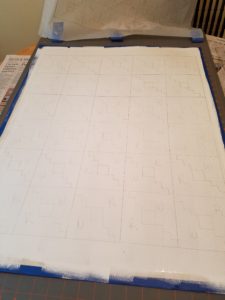
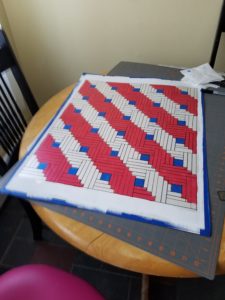
I considered several different blocks, should I include my signature embroidery and whether the end result would be ornamental only or work as an actual mailbox! Deciding that a working box was the way to go, the design and colors should be recognizable by folks driving past it. I also needed to use material that would stand up to the elements. A trip to the local Curtis Lumber helped me find very thin sheet metal (the top and backing) and 1/4″ sheathing insulation (the batting). I cut the metal sheet down (first time with tin snips!) being sure to leave a few inches on each side – just in case – like not cutting off the extra backing and batting until you’re completely done quilting. Then to the drafted layout and started painting.
Pattern with colors selected
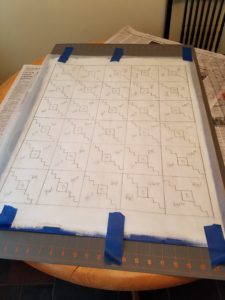
It was about this time I realized that I would need to draw the line for each log cabin strip in order for the pattern to be seen properly. I started with an ultra fine Sharpie, then to a fine Sharpie and settled on a regular Sharpie. Also, I should have been more careful when noting what color went where. Even though I used a #2 mechanical pencil, and did my best to erase some of the notes, the only way I could get rid of my writing was to paint over – especially on the white areas.
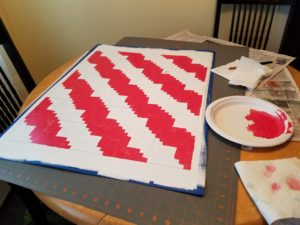
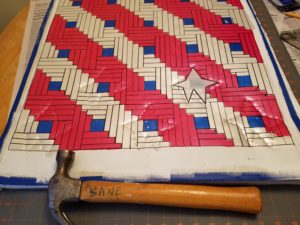
I painted in the blue centers, touched up several oops and started drawing in the lines of each strip so as to make the pattern be more noticeable. More touch -ups (need to be more precise next time – I know better from my decorative painting days!) and now onto the layering of the “quilt”. I cut out a piece of the insulation to the exact size of the mailbox, shaving off just a little around the edges to help facilitate wrapping the front part to the back. No binding on this quilt. Then on to the “quilting”
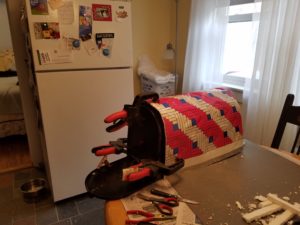
It was a bit tricky to “quilt” – hit too hard and you go through the thin metal, the surface of the quilt was slippery so almost lost a body part here and there. I cut down the front so that it would wrap around the insulation and used pliers to bend each inch of the quilt top down and under the “batting” (the insulation). Finally would fit nicely on mailbox. But then needed to gently but firmly wrap the quilt into it’s new shape – and keep it there!
Used a few C-clamps and let sit for a day.Had planned on using nuts and bolts to attach quilt to mailbox but wasn’t strong enough. And I felt the edges of the quilt along the bottom of the box should be smooth and safe.
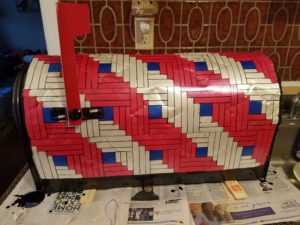
Called an engineer friend, who came over with rivets (would have been another first for me but wasn’t strong enough to use), which he used to secure the quilt to the mailbox. There was also the issue to reattach the flag (and be usable). I needn’t worry, friend figured it out! I completed the project by using spray expandable insulation in areas between top and bottom of quilt (to protect batting), painted that insulation and the edges of the quilt glossy black and applying 3 coats of special exterior spar urethane.
All of the mailboxes for the fundraiser are on display at the West Sand Lake Key Bank for the silent auction. You can also see them on the Society’s website at http://www.rootsweb.ancestry.com/~nyslhs/mailboxes/index.htm. Auction is complete and boxes off to new home on Tuesday, May 9th at the Sand Lake Center for the Arts. This is just another way for quilting to beautify the world and I’m already planning next year’s mailbox! Until next time…
Keep Stitching!
Lynn
Snow Day!!!
It’s a “snow day” today here in the Northeast. We haven’t had many this season and certainly not like this one. Took the time late yesterday to refill the bird and squirrel feeders, suet holders packed and smeared peanut butter on a dead tree for the woodpeckers (boy, did they like that and there were lots of them). After shoveling the car out and cleaning it off, I shoveled an area for seed for the ground feeders. The many birds look twice as big today as their feathers are all fluffed up to keep them warm. It has been so much fun to watch them all!!
Today, I will stitch away the hours, stopping only to walk the Puppy Girls or replenish the feeders and a chicken pot pie will be in the oven shortly. Be healthy and safe today, it’s a snow day!
Lynn